
How We Restored This Cloudy Headlight by Hand
Headlight restoration is one of those services that looks much harder than it actually is. For this restoration, we removed the damaged and oxidized outer layer using a gradual sanding process, refined the lens, and finished it with a protective coating.
5 Stages, Start to Finish
What We Used
For this restoration we used the 3M Ultra Headlight Restoration Kit. The complete kit is convenient when getting started, but detailers completing this service regularly may lower their material cost by purchasing the sanding stages and protective coating separately.
The Complete 3M Kit
The complete 3M kit packages the primary sanding stages and protective coating into one restoration system. This is the easiest way to try the process without sourcing every product individually.

Individual Supplies
Purchasing the sanding sponges and coating separately may make more sense when adding headlight restoration as a recurring detailing service.


The Headlight Restoration Process
This is the process used for the restoration shown. Product instructions should always be followed, and the starting point depends on the condition of each lens.
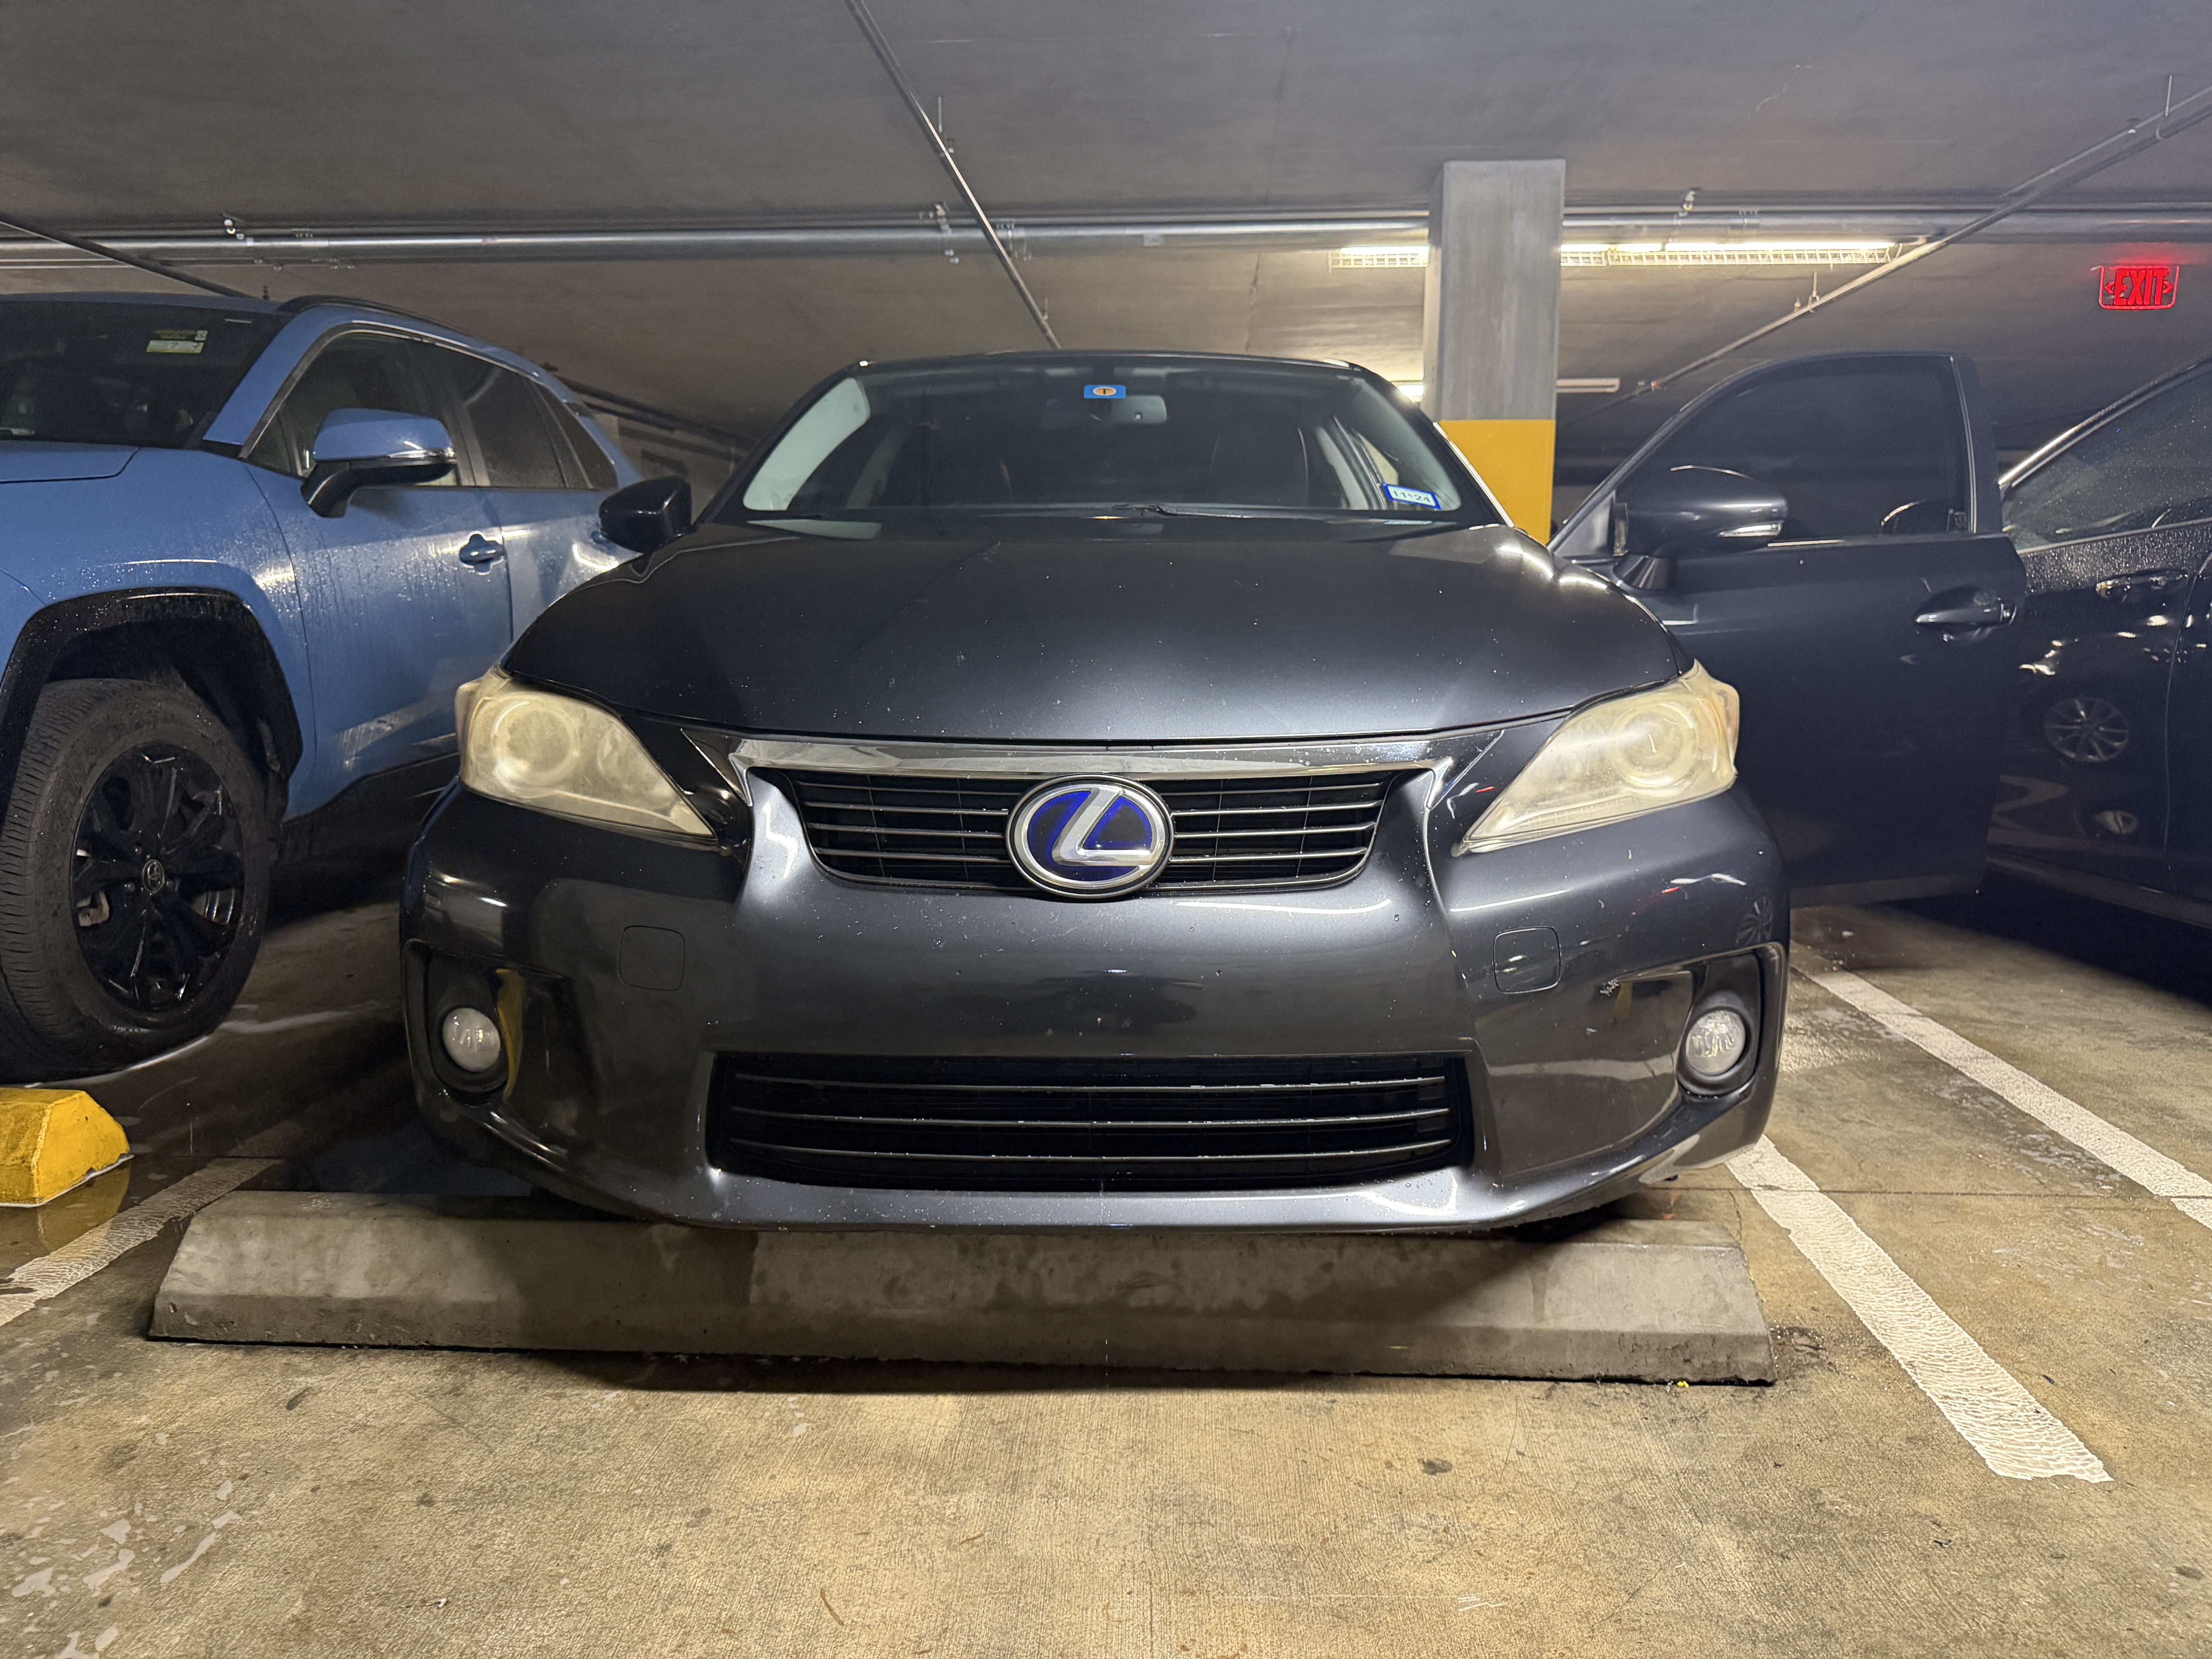
Clean and Inspect the Headlight
Clean the headlight thoroughly before sanding so dirt and loose contamination are not dragged across the plastic. Inspect the lens for exterior oxidation, cracking, internal condensation, or damage that sanding may not correct.
Tape the Surrounding Area
Thoroughly mask the painted panels, trim, rubber seals, and any nearby surfaces that could accidentally be contacted during sanding. Use more than one layer around tight edges when additional protection is needed.
Begin with 500–600 Grit
For the restoration shown, we began with 500–600 grit because the lens had visible oxidation that needed to be removed. We completed this stage by hand using a soft sanding sponge and water.
A sanding sponge helps distribute pressure more evenly than holding loose sandpaper directly with your fingertips. Use light, controlled pressure and overlapping passes across the lens.
Continue until the surface has a consistent frosted appearance. Remaining glossy or uneven areas may indicate that sections of the damaged outer layer have not been fully addressed.
Wipe and Inspect
Wipe the lens clean after each sanding stage. Inspect it from multiple angles and under direct lighting. Look for inconsistent gloss, missed corners, deeper scratches, or areas that do not match the rest of the frosted surface.
This inspection step prevents moving forward before the previous grit has completed its job.
Refine with 800–1000 Grit
We followed the 500–600 grit stage with 800–1000 grit, completing controlled passes to further smooth and even the lens. The purpose of this stage is to refine the deeper marks left by the more aggressive sanding step.
Continue using light pressure and overlapping passes. Tight corners and curved edges may require shorter hand movements and careful repositioning of the sponge.
Finish with 3000 Grit Wet Sanding
We finished the sanding process using 3000 grit with water. This finer stage further refines the surface before the protective coating is applied.
Keep the surface lubricated, work evenly, and periodically wipe the lens clean to inspect the finish. At this stage the lens may still appear foggy or cloudy. Visible clarity returns during the final protection stage.
Clean and Prepare the Surface
After sanding is complete, thoroughly clean and dry the lens according to the requirements of the coating being used. The surface should be free from sanding residue, loose contamination, and moisture before protection is applied.
Apply the Protective Coating
Apply the supplied 3M coating or separately purchased headlight clear coat according to the exact manufacturer instructions. Follow all label requirements regarding application method, number of coats, flash time, ventilation, curing, moisture exposure, and handling.
Protective coatings and aerosol products must be used according to their labels and safety data. Use the required personal protective equipment and proper ventilation. Do not apply in enclosed spaces or without reviewing the product's safety data sheet.
Inspect the Final Result
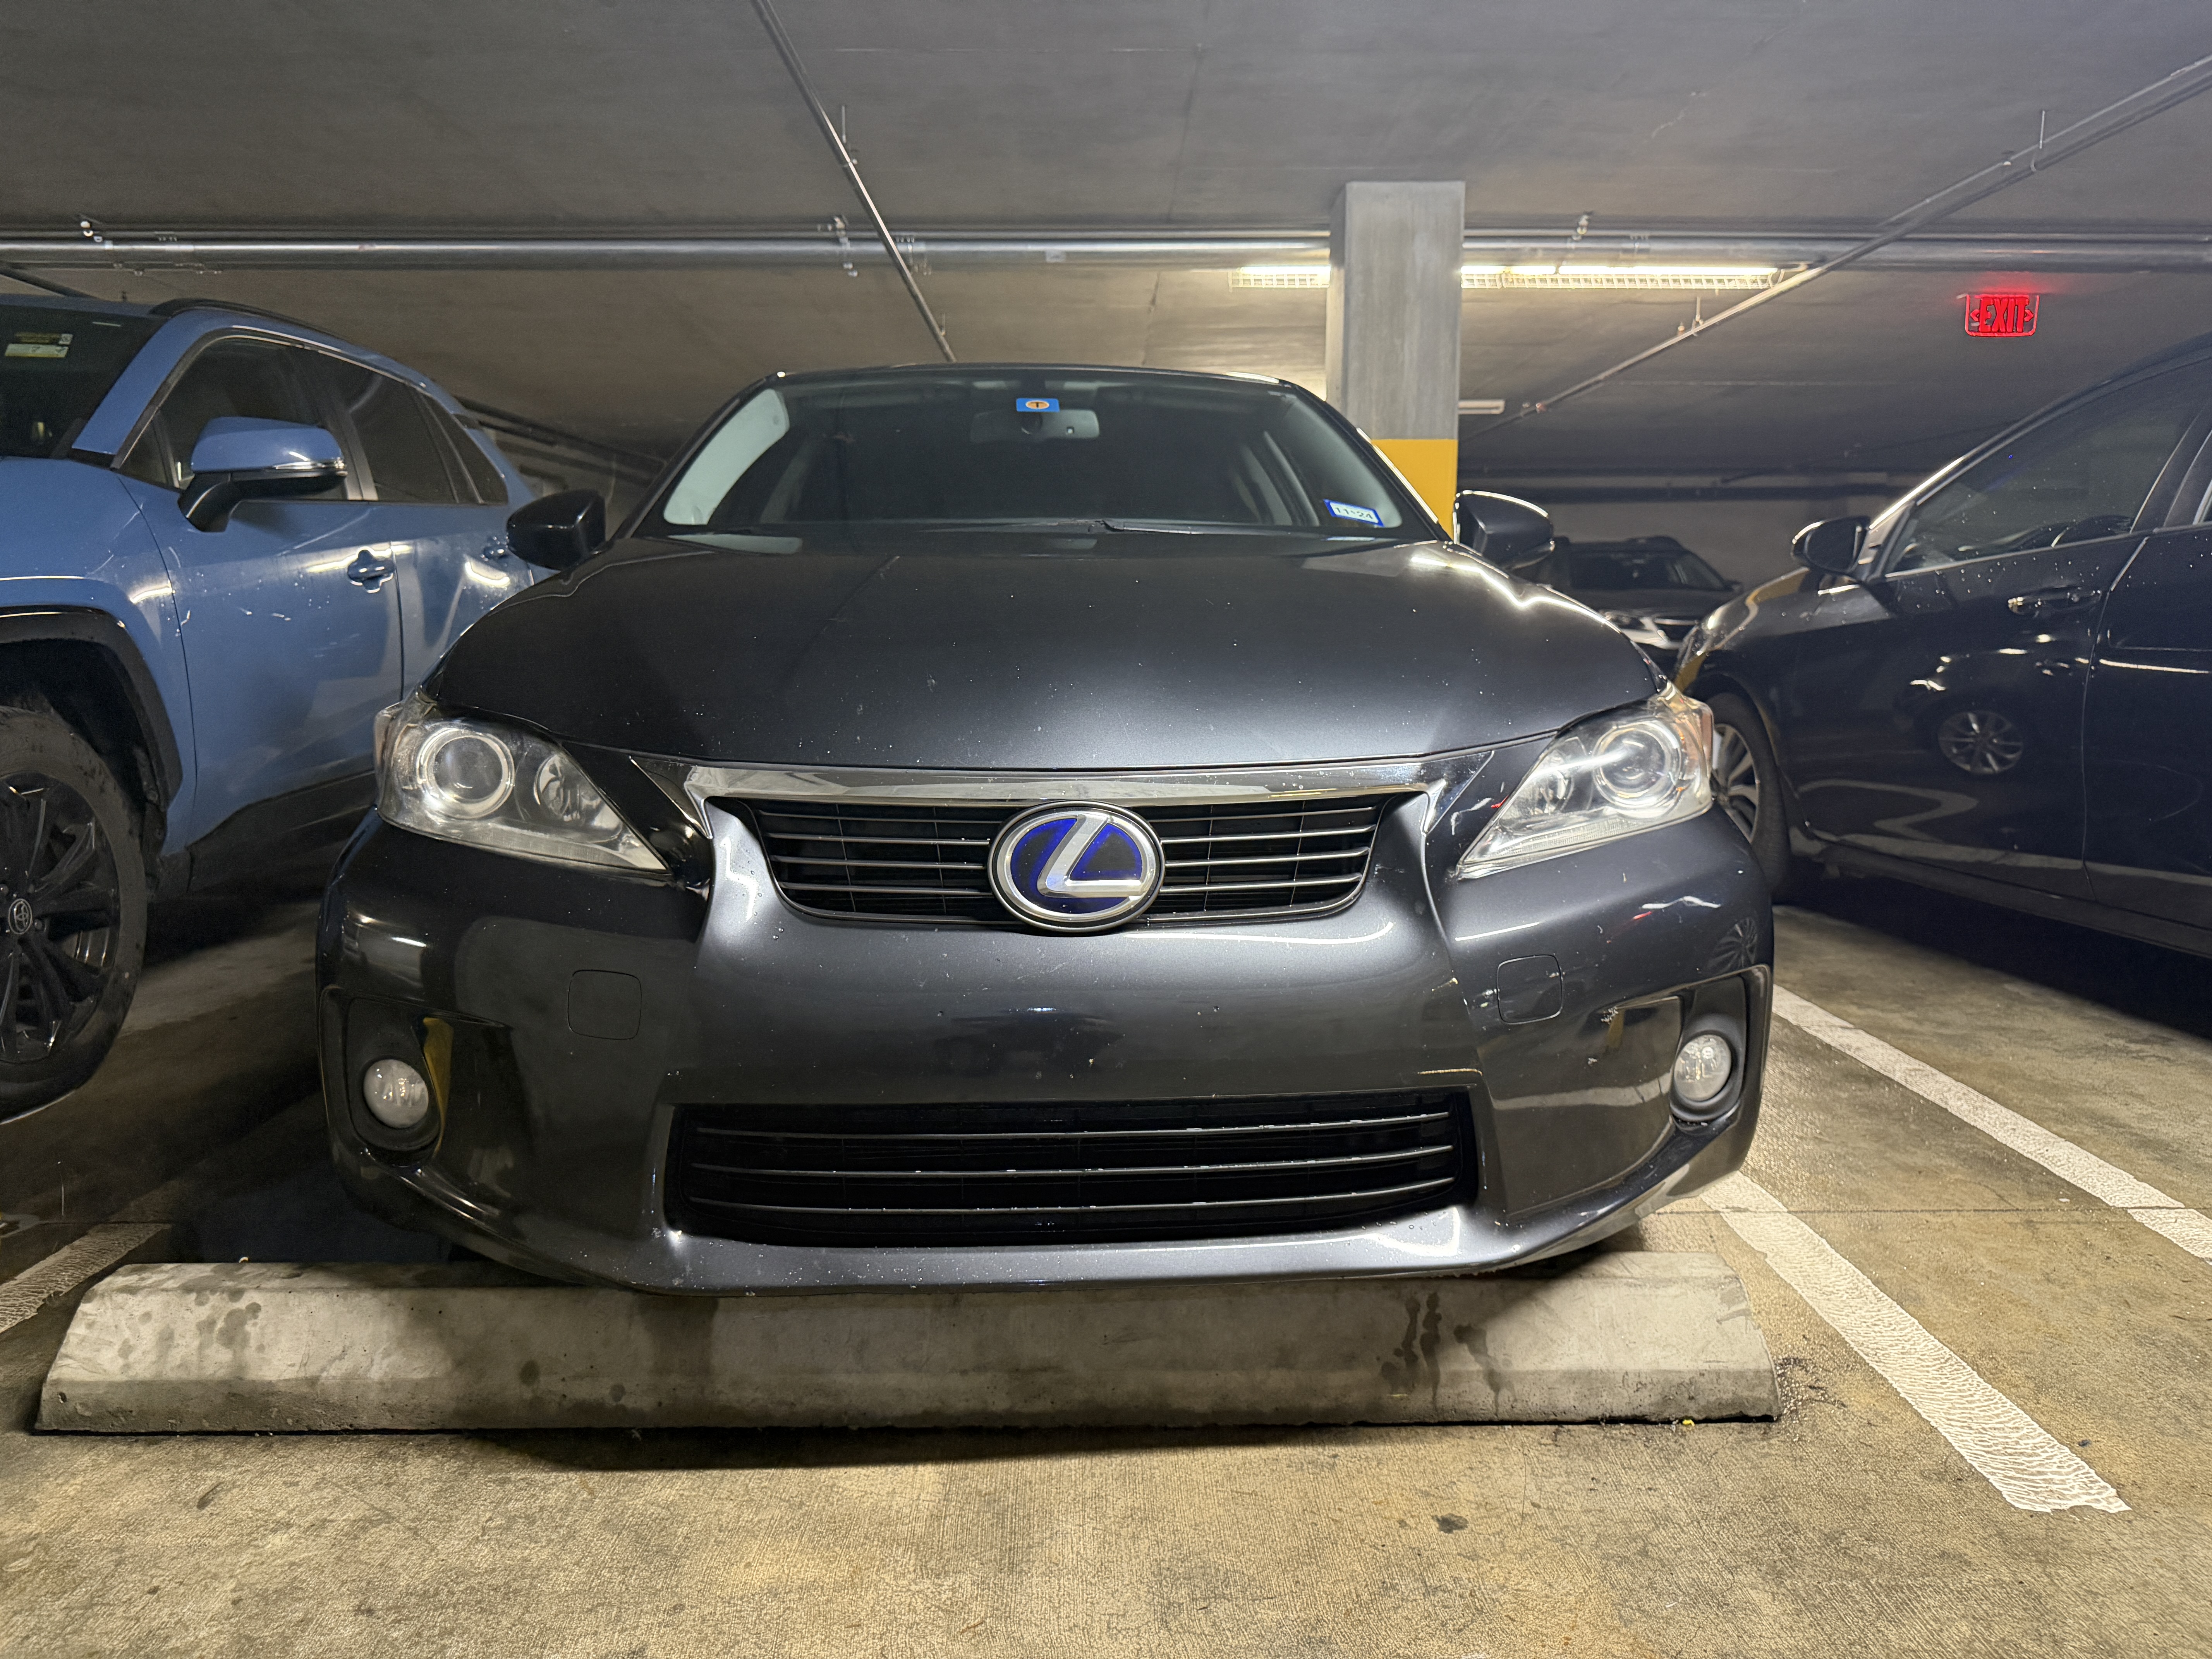
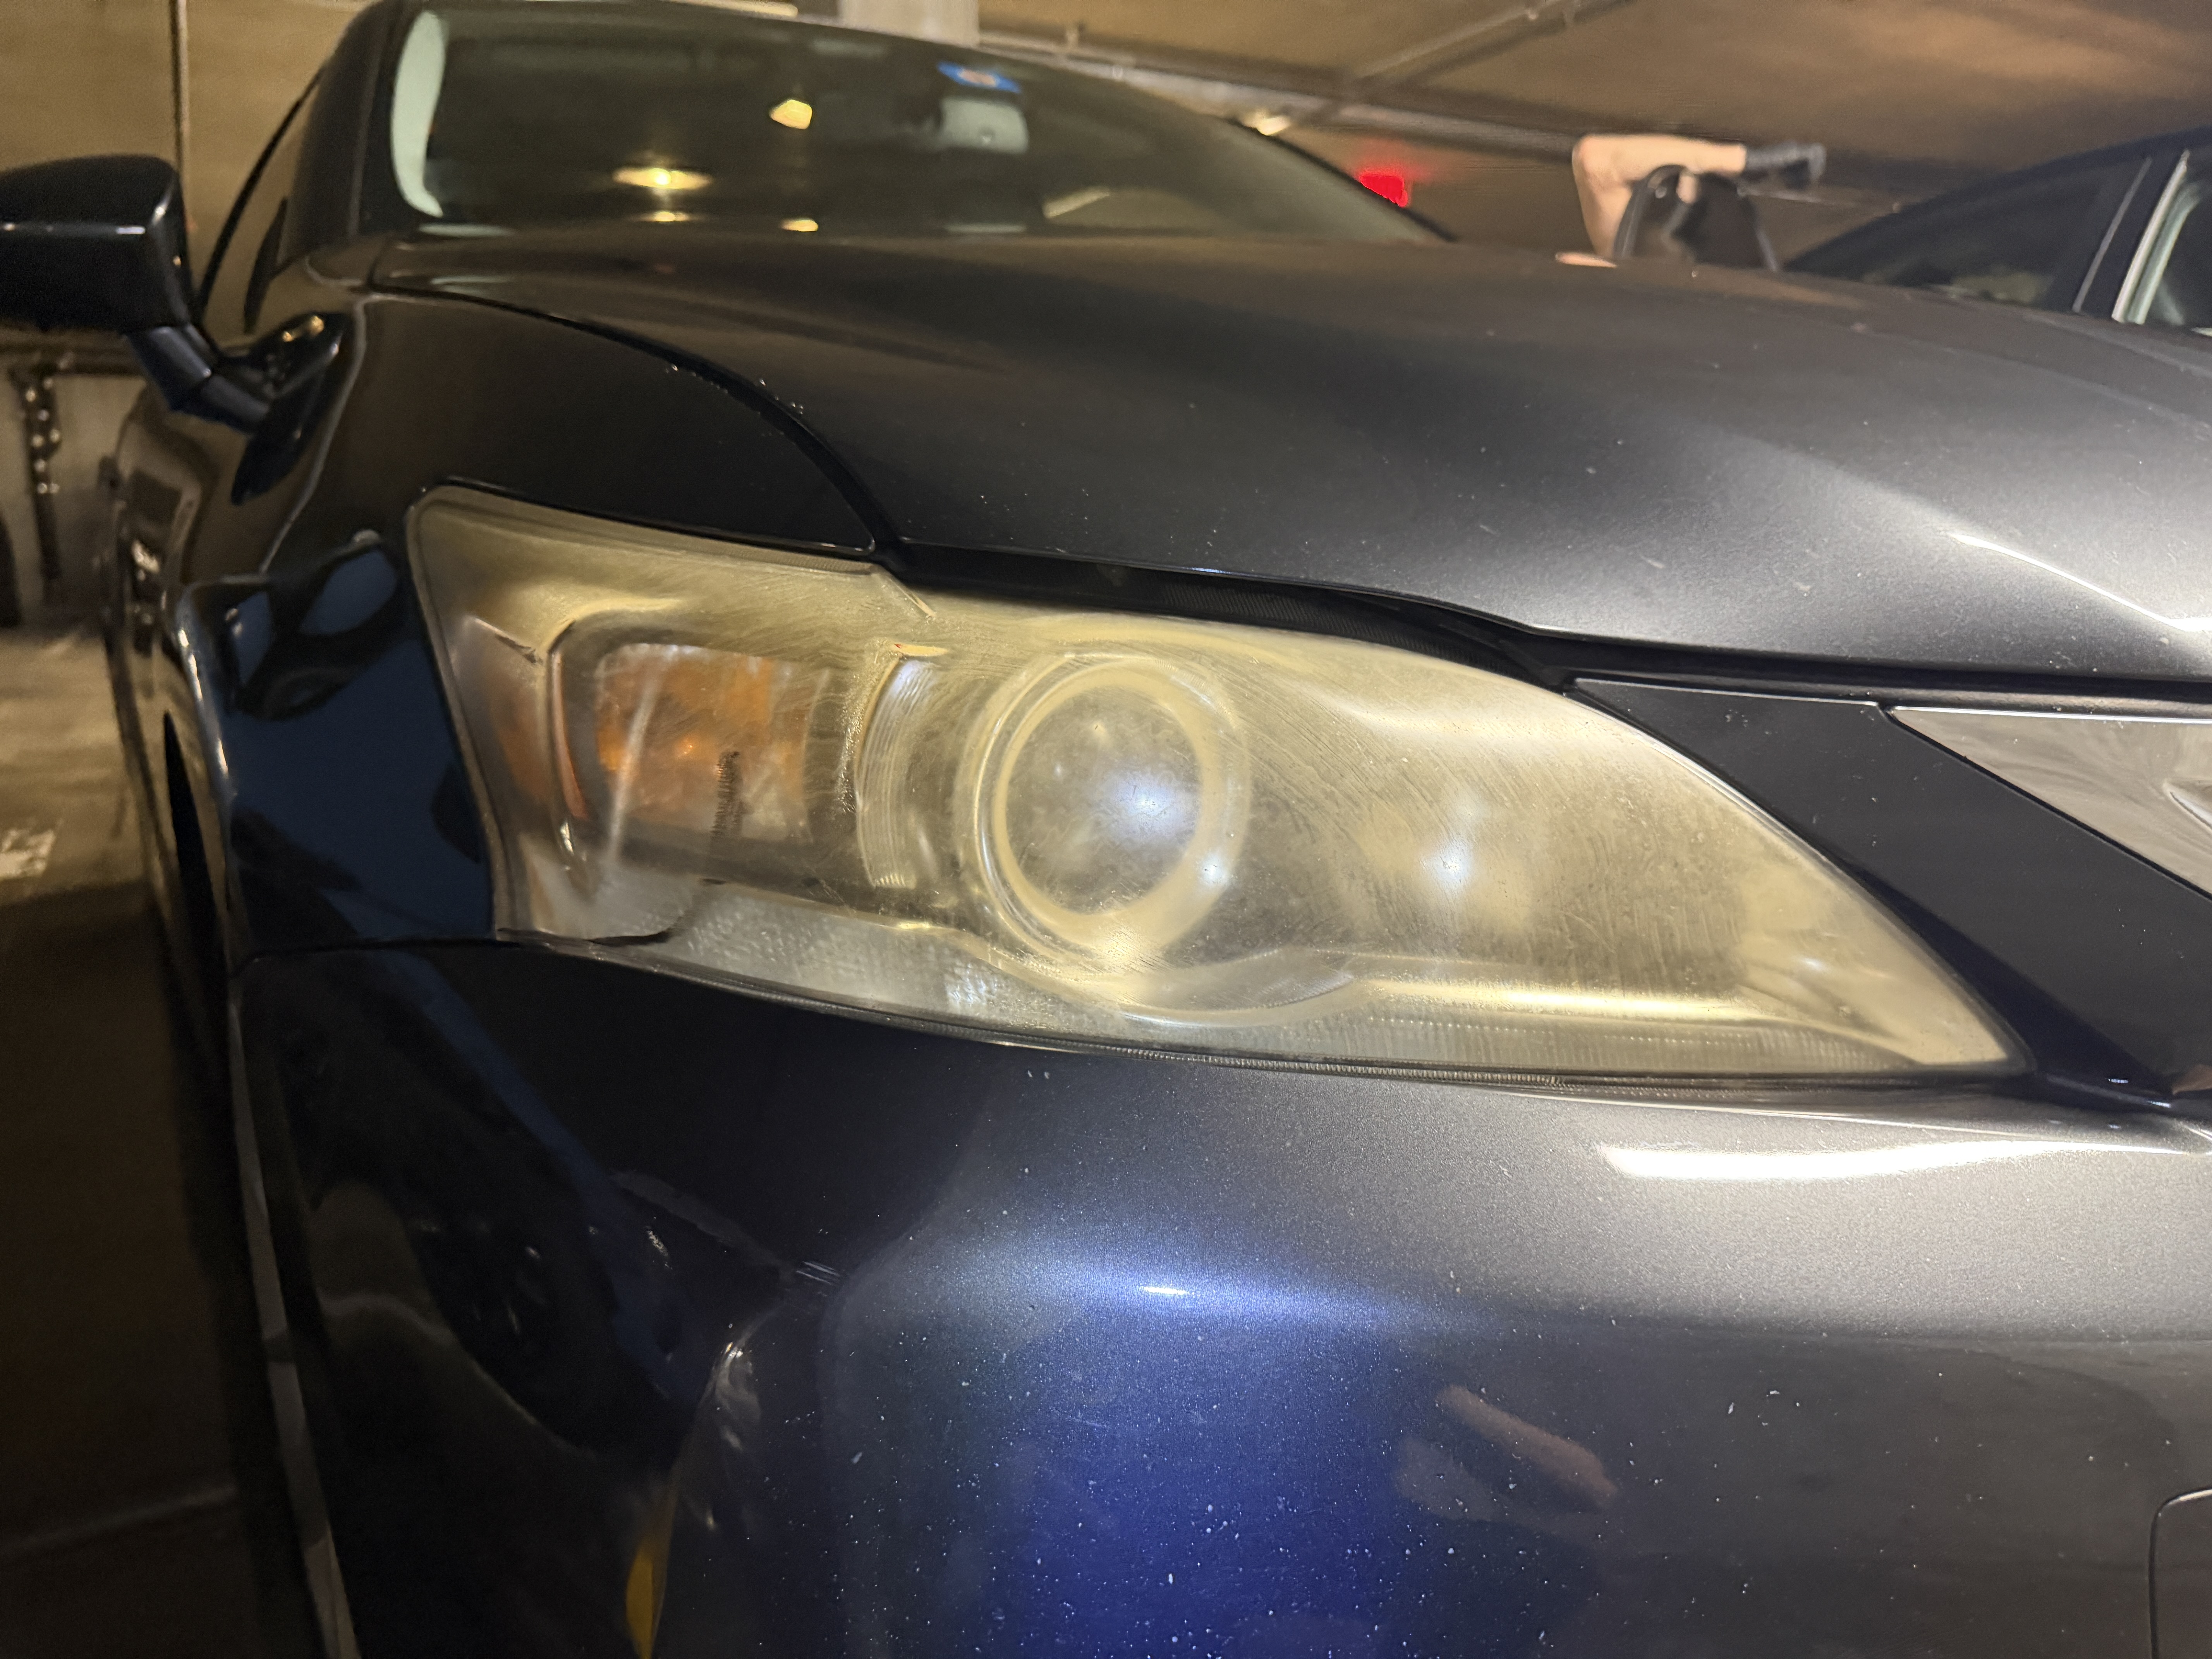
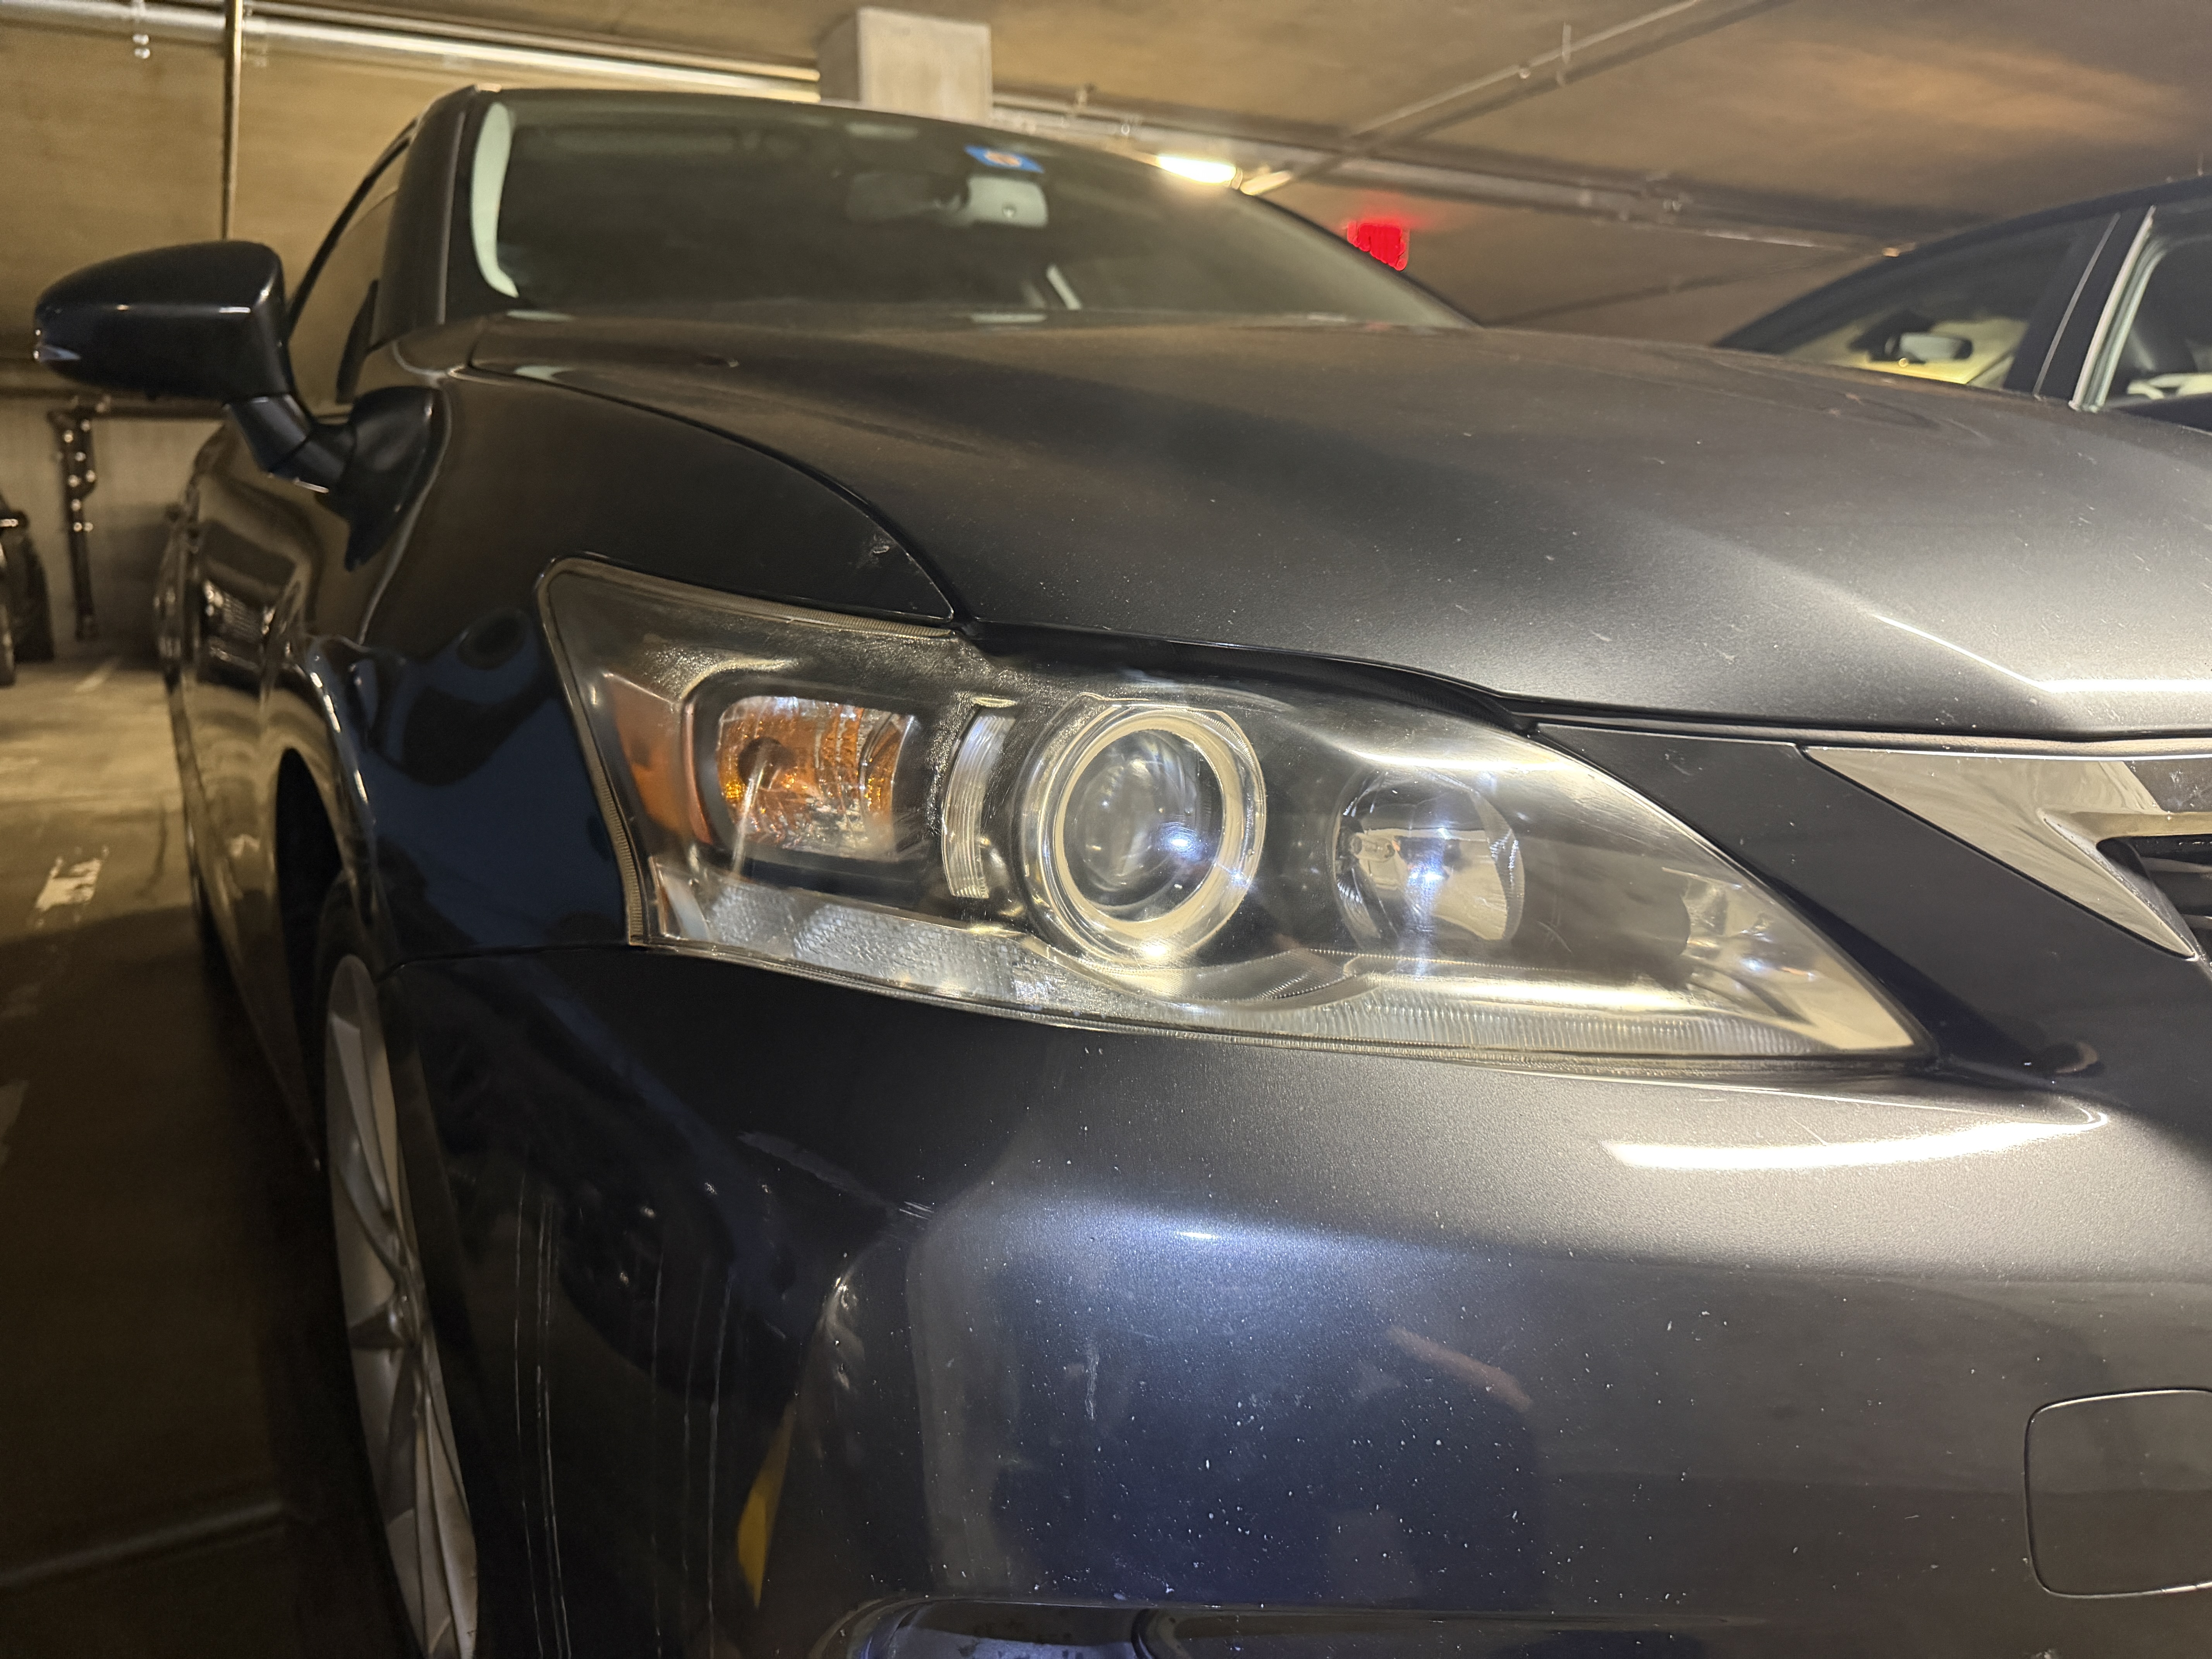
Once the coating has been applied correctly, inspect the headlight from the same angles used during the initial assessment. Matching before-and-after angles will make the improvement easier to evaluate and document.


Mistakes to Avoid
⚠ Skipping the inspection between grits
Moving to a finer grit before the lens is evenly sanded can leave visible inconsistencies behind.
⚠ Using too much finger pressure
Holding sandpaper directly with your fingertips can create concentrated pressure points. A soft sanding sponge makes hand pressure easier to control and distribute.
⚠ Sanding unprotected paint or trim
Always mask the surrounding surfaces before beginning. The sanding stages will damage unprotected paint and trim.
⚠ Rushing the final preparation
Residual moisture, dust, or sanding material can interfere with the final protective coating if the surface is not properly cleaned and dried first.
⚠ Assuming all haze is exterior oxidation
Internal condensation, cracking, or damage inside the assembly may not be corrected through exterior sanding. Inspect first.
⚠ Ignoring the coating instructions
The final coating is a product-specific process. Follow its label rather than assuming every coating applies and cures the same way.
Should You Buy the Kit or the Supplies Separately?
Buy the kit when:
- You are trying headlight restoration for the first time
- You want the sanding stages and protection packaged together
- You only expect to complete occasional restorations
- Convenience matters more than reducing the cost per job
Buy separately when:
- You plan to offer the service repeatedly
- You want more control over material quantities
- You already understand the sanding and coating process
- You want to reduce waste from purchasing complete kits repeatedly
Why Restore Cloudy Headlights?
Cloudy and oxidized headlights can make an otherwise clean vehicle look older and poorly maintained. Restoring the exterior lens can improve the overall appearance of the front end and may improve usable light output when exterior oxidation is obstructing the lens.
If you would prefer to have the restoration done for you rather than completing it yourself, we do it as part of a mobile visit.
You can see a finished pair on a real customer car in the Lexus CT200h job, shot before and after on the same lens, and the full method is on this page above.
Request a Headlight Restoration Quote →Adding Headlight Restoration to a Detailing Service
For mobile detailers, headlight restoration can be a practical additional service because the required tools and materials are relatively compact and the transformation is easy for customers to understand.
The service can be offered alongside an exterior detail, paint correction, or full detailing package when the headlight condition makes it appropriate.
Want the exact process from the video?
Comment "HEADLIGHT" on the restoration video and we'll send you the full process with everything we used.
Choose the Setup That Works for You
Use the complete 3M kit for a convenient all-in-one starting point, or view the separate sanding and coating supplies if you plan to complete headlight restorations regularly.